How to Add Rustic Charm to Your Home with a Simple Vintage Tool Decor Project
Looking for a simple way to add rustic charm to your home? Discover how to turn an old wooden hand planer into stunning vintage tool decor with flowers, easy, beautiful, and budget-friendly!
You know those days when you’re just minding your own business, wandering through the thrift store, and then – bam – something catches your eye?
That’s exactly what happened to me last week.
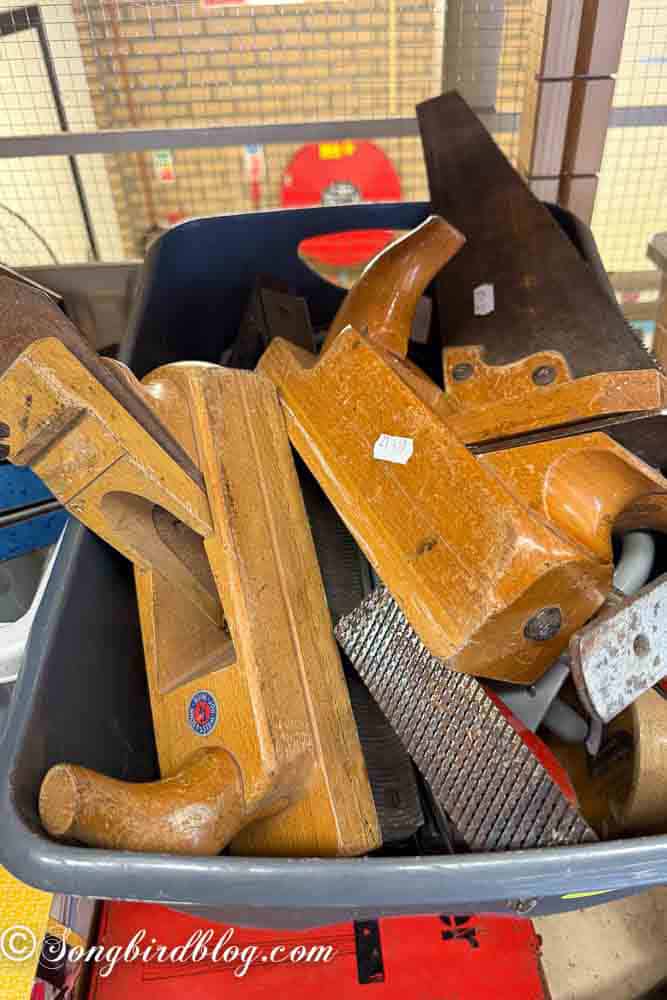
There, tucked between a stack of chipped teacups and a very questionable lampshade, was a crate of old wooden tools. The kind with worn handles and that good, honest patina that whispers stories of barns and workshops from long ago. I reached out. Fingers hovered.
And then I stopped.
Because, of course, right about then, my brain helpfully reminded me: Mariannne. You have a barn full of these at home.
(Does this happen to you too? You’re about to buy something wonderful and then suddenly remember you already own three of them? No? Just me?)
So I did what any reasonable person would do.
I went home, dug through the dusty corners of our old farmhouse barn, and unearthed a treasure trove of forgotten antique tools. And let me tell you, buried under decades of cobwebs and memories, I found the most perfect little candidates for a project I’d been dreaming up.
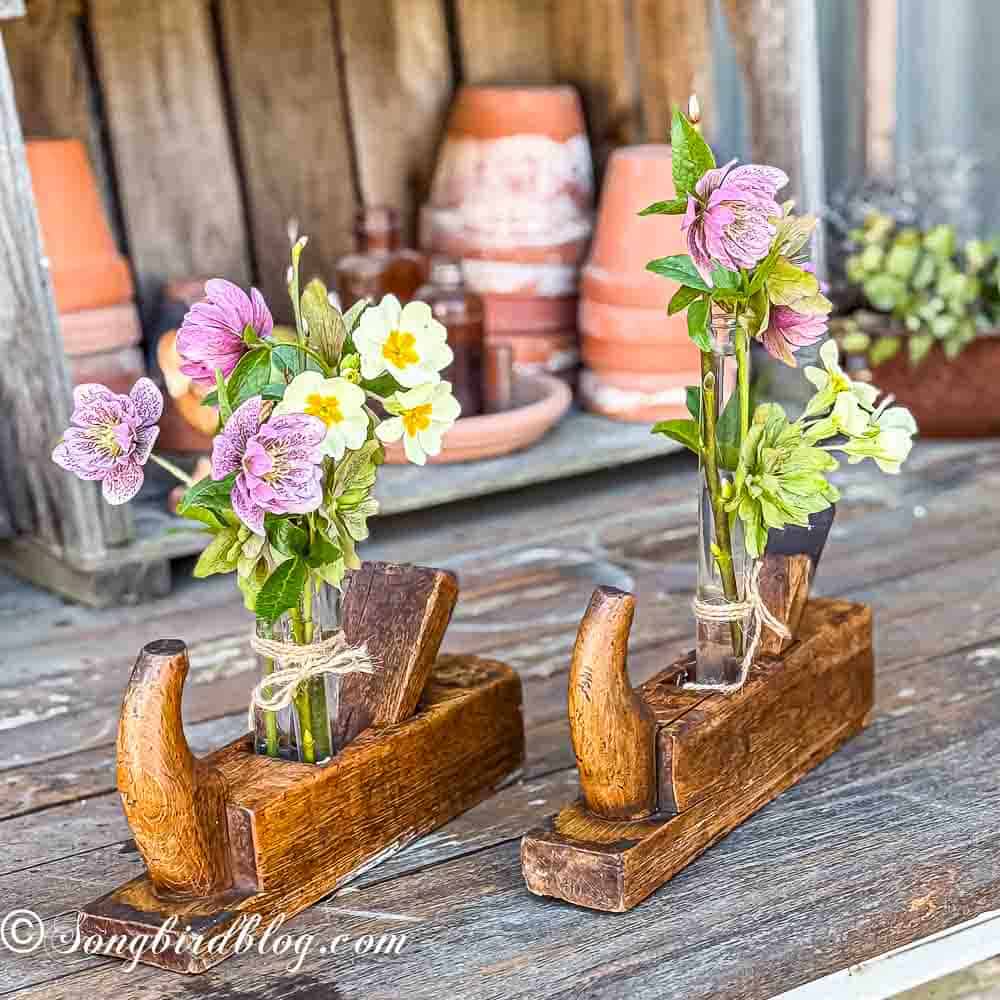
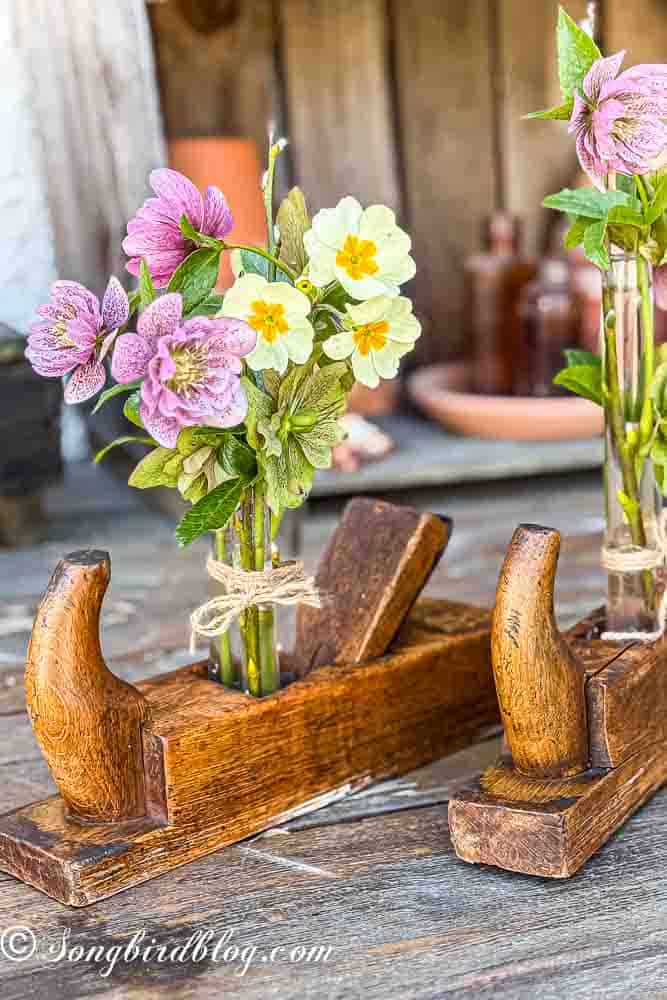
Two old wooden hand planers: scruffy, a little worse for wear, but full of character. The kind of vintage tool that makes your heart skip a beat.
Want to see what I did with them?
Today, I’m going to show you how to make a beautiful flower display by turning old wooden tools into vintage tool decor. It turned out to be an easy and fun upcycle craft that I know I will enjoy for many seasons to come.
Speaking of upcycle projects. Today’s vintage tool decor project is my entry for the monthly Wednesday Thrift Store Decor Tour. It is the second Wednesday of the month again a little online crafting get-together is happening where my friends in blogging and thrifting, share their latest makeover projects. You can find all the amazing thrift store projects for this month at the bottom of this post.
How to Turn an Old Wooden Hand Planer into a Flower Display (The Simple, No-Fuss Way)
There’s something about vintage tools that just feels like they fit right into my home. I can’t help seeing them like possible decor, much more than as practical tool.s Maybe it’s the way they carry history in their scratches. Or it is simply that vintage wooden tools were made and maintained with such care and respect, and it shows.
Either way, I knew these old hand planers were destined for a new life outside of the old barn.
Here’s how I gave them new life.
Step 1: Clean and Prep Your Vintage Tool
First things first.
Those old tools? They’ve seen things. Dirt. Grime. Maybe some insects taking up residence.
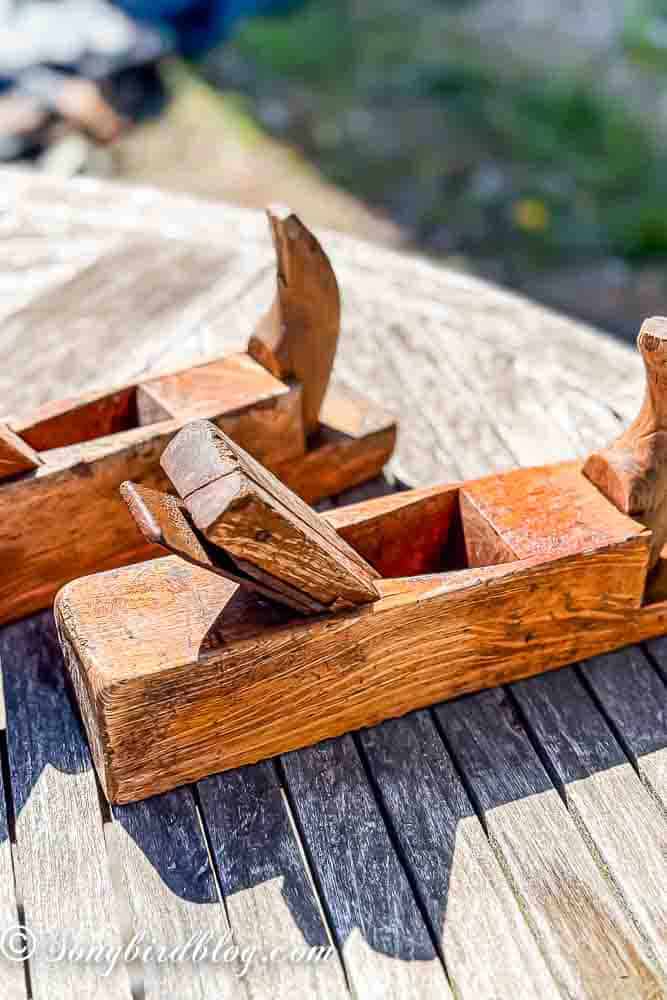
I started by giving my antique hand planers a good scrub with warm, soapy water and a stiff brush. Nothing fancy, just enough to remove the years of grime without stripping away their charm. Then, I let them dry completely in the sun.
(Pro tip: If your tools are extra stubborn, a little vinegar in the water works wonders.)
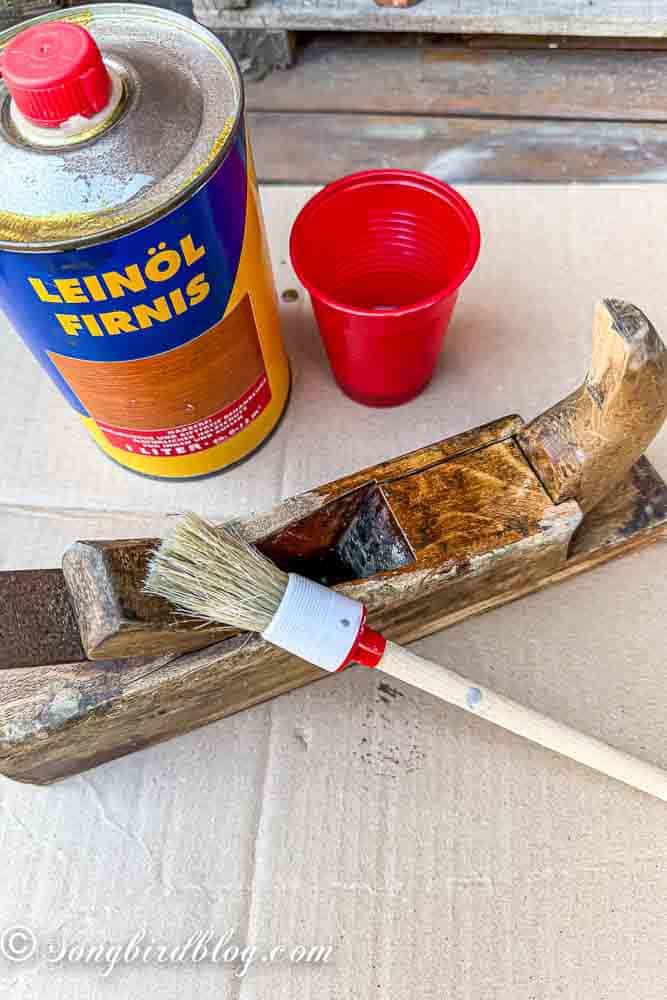
Once dry, I treated the wood and the metal bits with a bit of linseed oil. This isn’t just for looks, it helps protect the wood and brings out that rich, warm patina that makes vintage tool decor so irresistible.
Step 2: Gather Your Supplies
Here’s what you’ll need:
- An old wooden hand planer (or any vintage tool with a similar shape)
- Small glass tubes or test tubes (I used a mix of sizes for visual interest)
- Jute string or twine
- Dark-colored fabric or filler material (to hide the mechanics)
- Fresh flowers or greenery
- Scissors
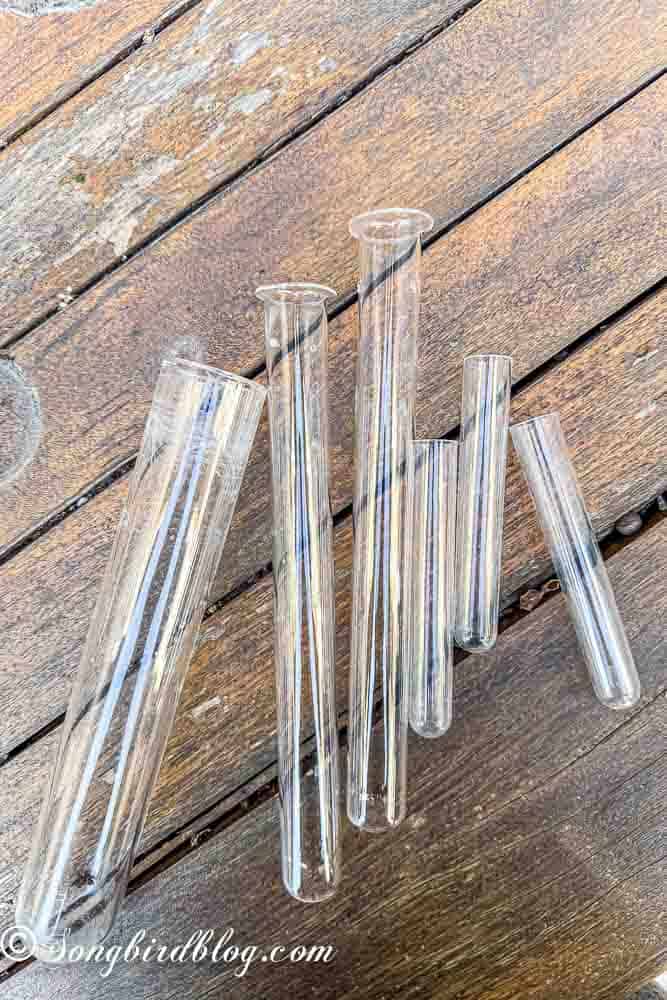
I had a stash of glass tubes left over from when I made my spring wreath with fresh flowers, but you can find them at craft stores, florists or even in a lab supply store. The key is to choose one or more tubes that fit snugly inside your tool.
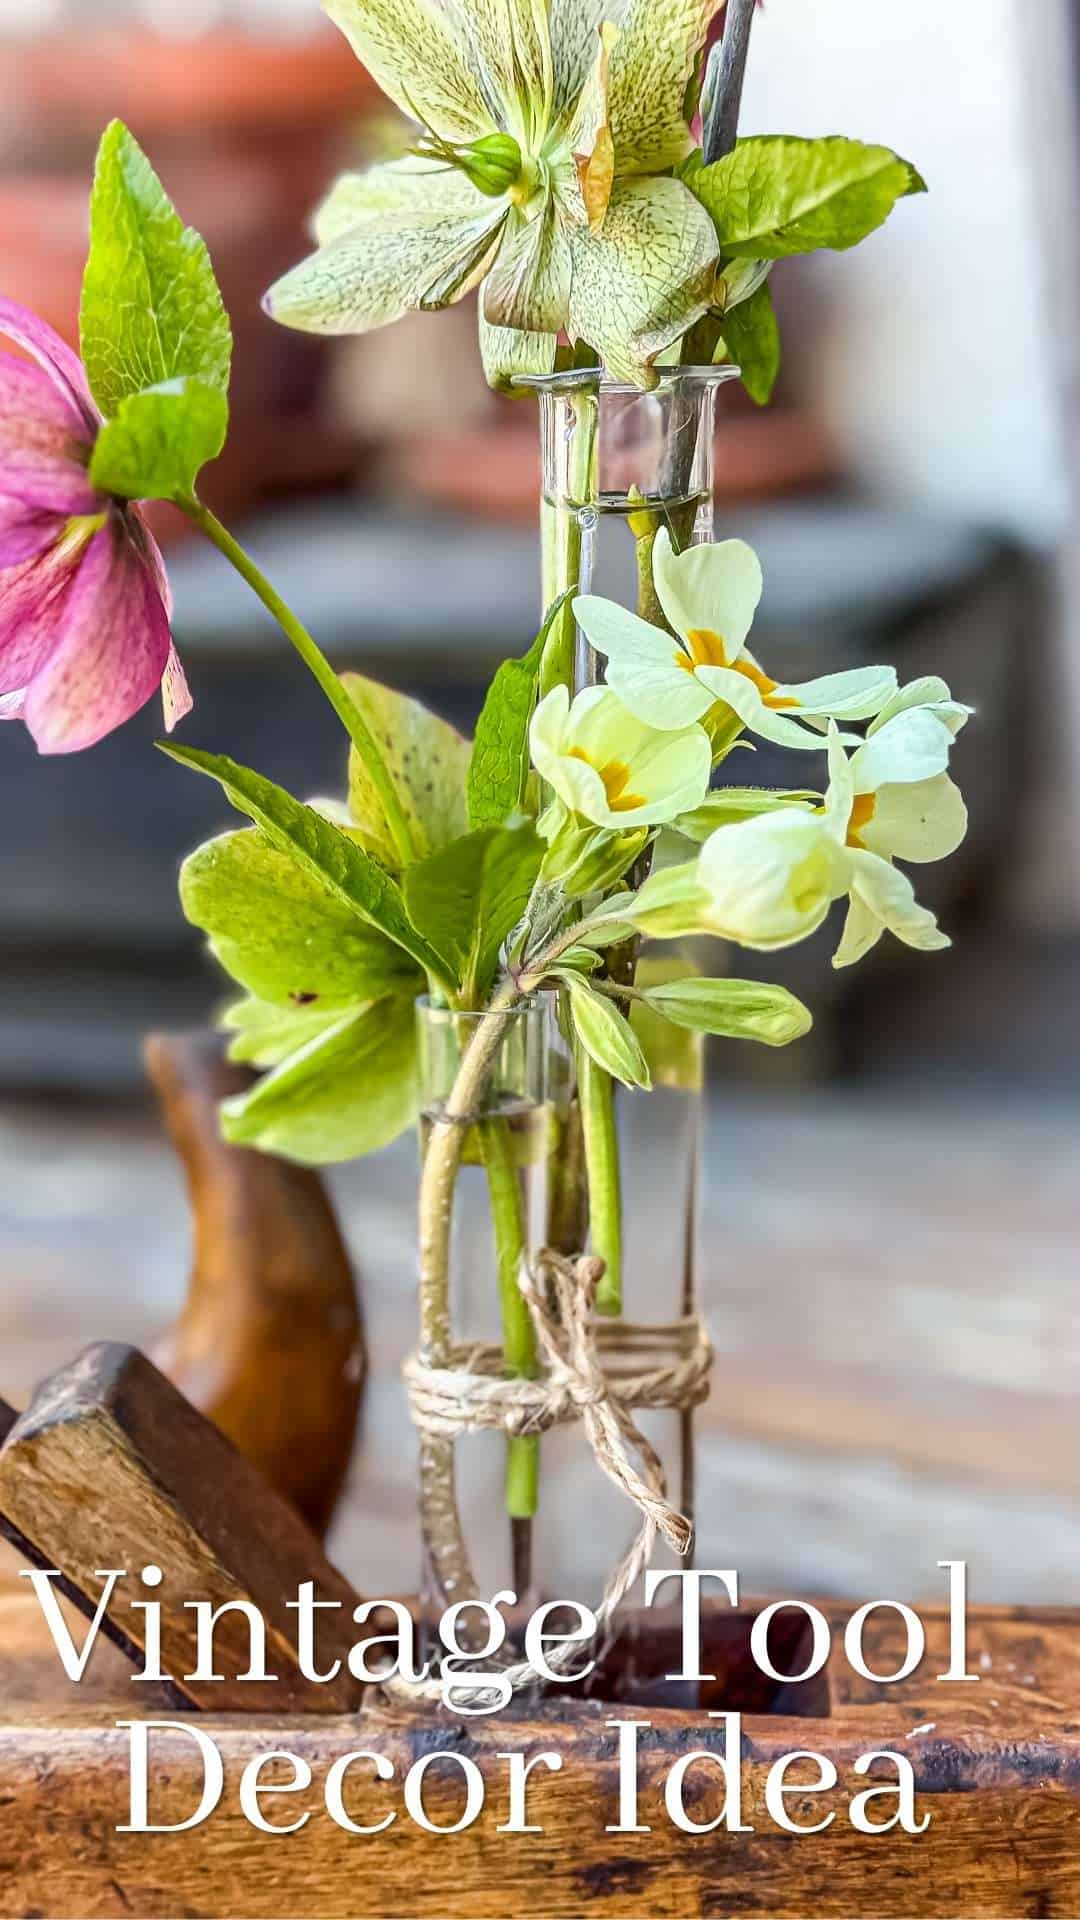
Step 3: Arrange and Secure the Glass Tubes
Now, here’s where the magic happens.
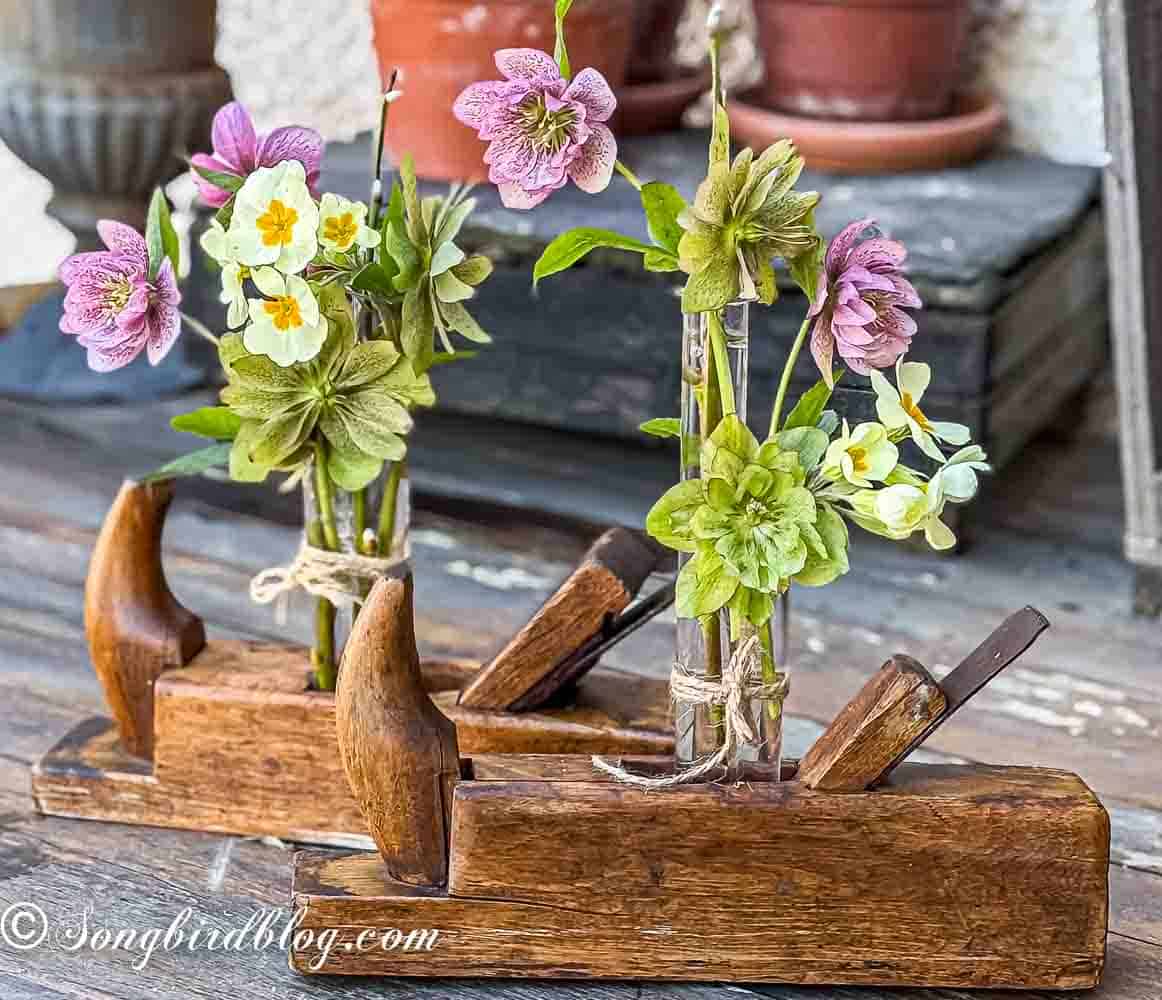
I played around with different arrangements and I ended up with three tubes clustered in the larger planer and just two in the smaller one.
Then I needed to secure the tubes inside the planer. At first, I tried hot glue.
And, well….
Let’s just say hot glue and glass tubes are not the dream team I thought they’d be. The glue globs were too obvious, and it just didn’t have that effortless, rustic vibe I was going for.
So, I switched gears.
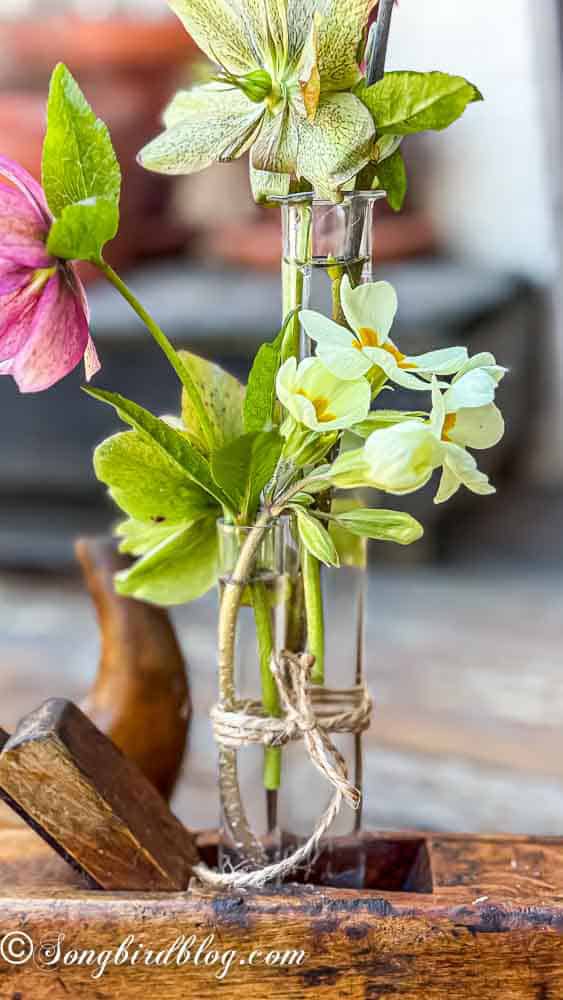
I tied the tubes together with jute string, creating little bundles that could sit neatly inside the planers. Then, I used small pieces of dark fabric to wedge the bundles into place, so they all stood up straight and snug.
The result?
A seamless, natural look that lets the vintage tool—and the flowers—shine.
Step 4: Add Water and Flowers
This is the fun part.
Fill your glass tubes with water, trim your flowers to the right height, and arrange them in the tubes. I used a mix of spring flowers and some twigs for a fresh, seasonal touch. But you could go for something more structured, like all white blooms, or even dried flowers for a year-round display.
And you know what I love most about this?
I can swap out the flowers whenever I like, which means my vintage tool decor can change with the seasons. DIY decorating just as I like it.
How to Use Old Tools for Decor: A Simple and Creative DIY Project
There’s something so satisfying about taking something old and forgotten and turning it into a piece of decor that feels fresh and full of life.
This project?
It’s simple. It’s budget-friendly. And it’s the kind of thing that makes people stop and say, “Where did you get that?”
(To which I can casually reply, “Oh, this old thing? I made it.”) (gosh, I hope someone asks me…)
Your Turn!
Now, I want to hear from you.
Do you have any old tools lying around, just waiting for a second chance? Or maybe you’ve already turned something unexpected into decor?
Tell me in the comments, I’d love to see what you come up with!
And if you’re as smitten with this idea as I am, don’t forget to save it for later.
Pin now, make it later.

So, what do you think of my little vintage tool decor? Let me know in the comments. I love to hear from you!
And then go and check out the amazing creativity of the other Thrift Store Decor Projects on this tour.
Thrift Store Decor Tour….
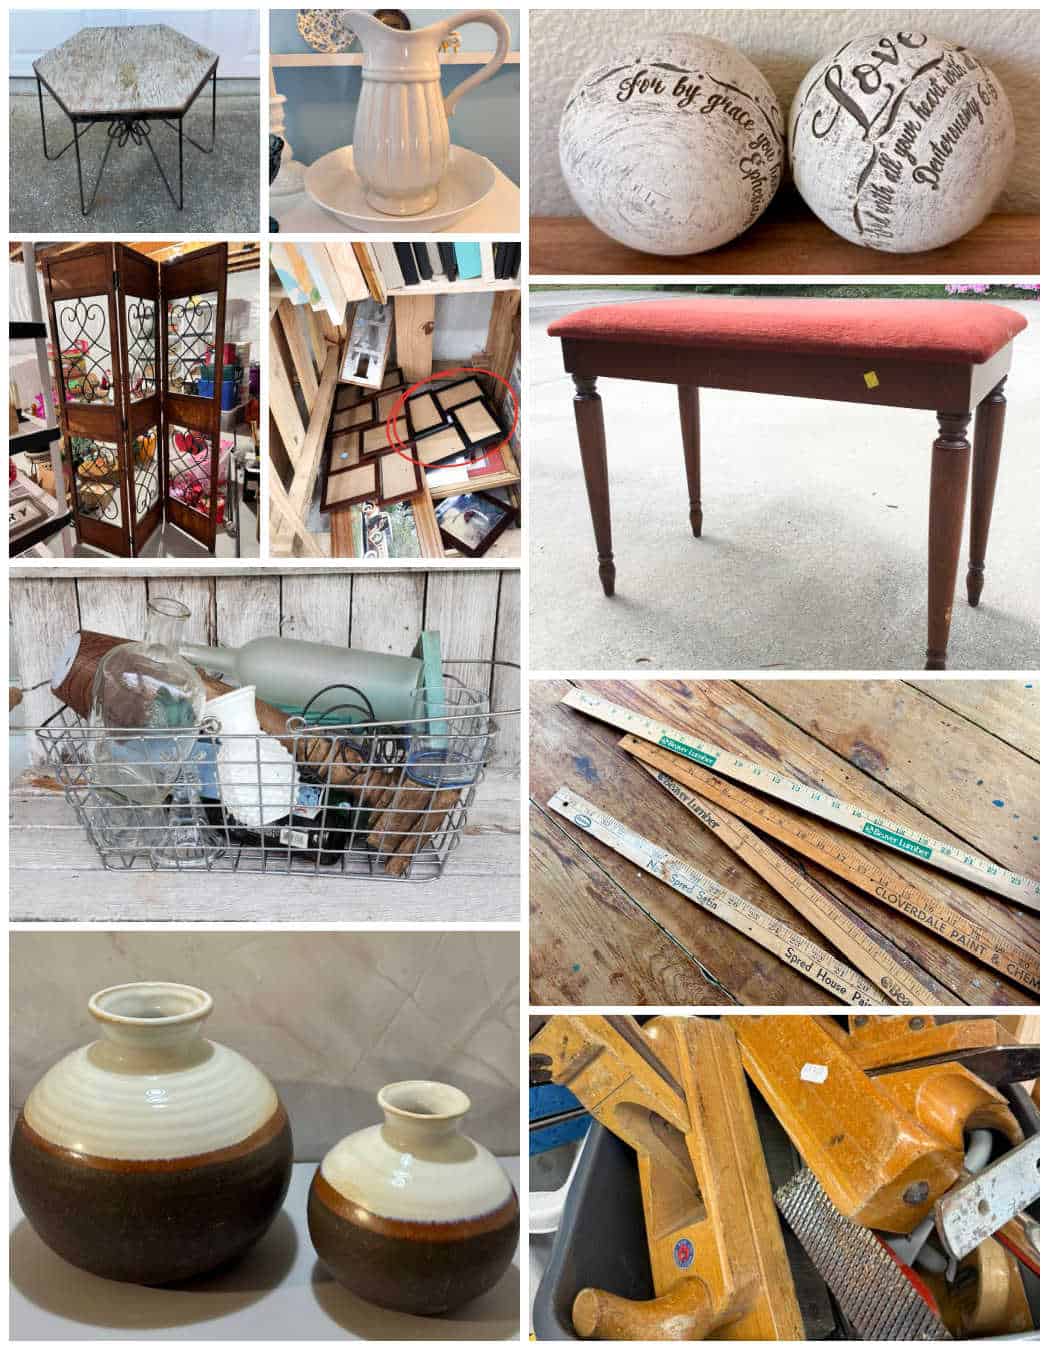
Shop at Blu Metal Outdoor Side Table Upcycle
Exquisitely Unremarkable DIY Decal Pitcher Makeover
My Uncommon Slice of Suburbia Easy Decorative Moss Balls for Spring
Redhead Can Decorate. How I Transformed Our Foyer with a Thrift Store Room Divider
Sadie Seasongoods. Geometric Abstract Art from a Collage Frame
Our Southern Home. Piano Bench Makeover with New Color and Fabric
My Repurposed Life Can This Become a Lamp?
Funky Junk Interiors. Rustic TV Stand Dresser Makeover with Easy Wood Strip Drawers
Our Crafty Mom. DIY Rope Vase Pottery Barn Dupe
CU AND HAPPY DIY DECORATING!
Beautiful!! Now that was an unexpected upcycle and just darling.
This is so beautiful with the flowers displayed, and i love that you had these already at home. I feel like this is something my grandparents had, I should have kept them 🙂
XO
Kristin
How absolutely beautiful! What is it about plants and flowers that can flip any rustic piece into an absolute wonder? Love that you had these on hand and were able to dream up something that would really make them shine! So inspiring, right before flower season. Time to dig through my own treasures and add a little more rustic charm to my own arrangements!
Marianne,
I love that you were able to add more than one test tube; that is my favorite part! Your vintage tool decor is drool-worthy! I’m glad the hot glue didn’t work, I love the jute. (I’m sure you would have used it anyway)
pinned!
gail
This turned out so lovely! It is so creative. The warmth of the old wood of the tool, paired with the spring flowers, is such a striking combination!
Marianne, this is just lovely! I have all of my Dad’s old tools. This would be a great way to scatter them around my home. Pinned.
Love this repurpose! Great way to enjoy old tools, especially if they’re sentimental:)