From Thrift Store Chandelier to Stunning Vintage DIY Christmas Bells
Looking for a fun Christmas bells craft idea? You’ll love these vintage-style DIY Christmas Bells made from a thrift store chandelier.

I wanted in on the trend…
I wanted it so badly…
For some time now I had spotted beautiful vintage-looking Christmas bells made from ugly and cheap dollar store bells on Pinterest. I wanted some for myself. Like really wanted them.
But I don’t know, maybe Christmas bells are simply not such a big thing here in Europe because I never spotted those ‘easy to give a makeover’ kind of Christmas bells in our dollar store isles.
But I had Christmas bells on my mind, and I just had to get me some.
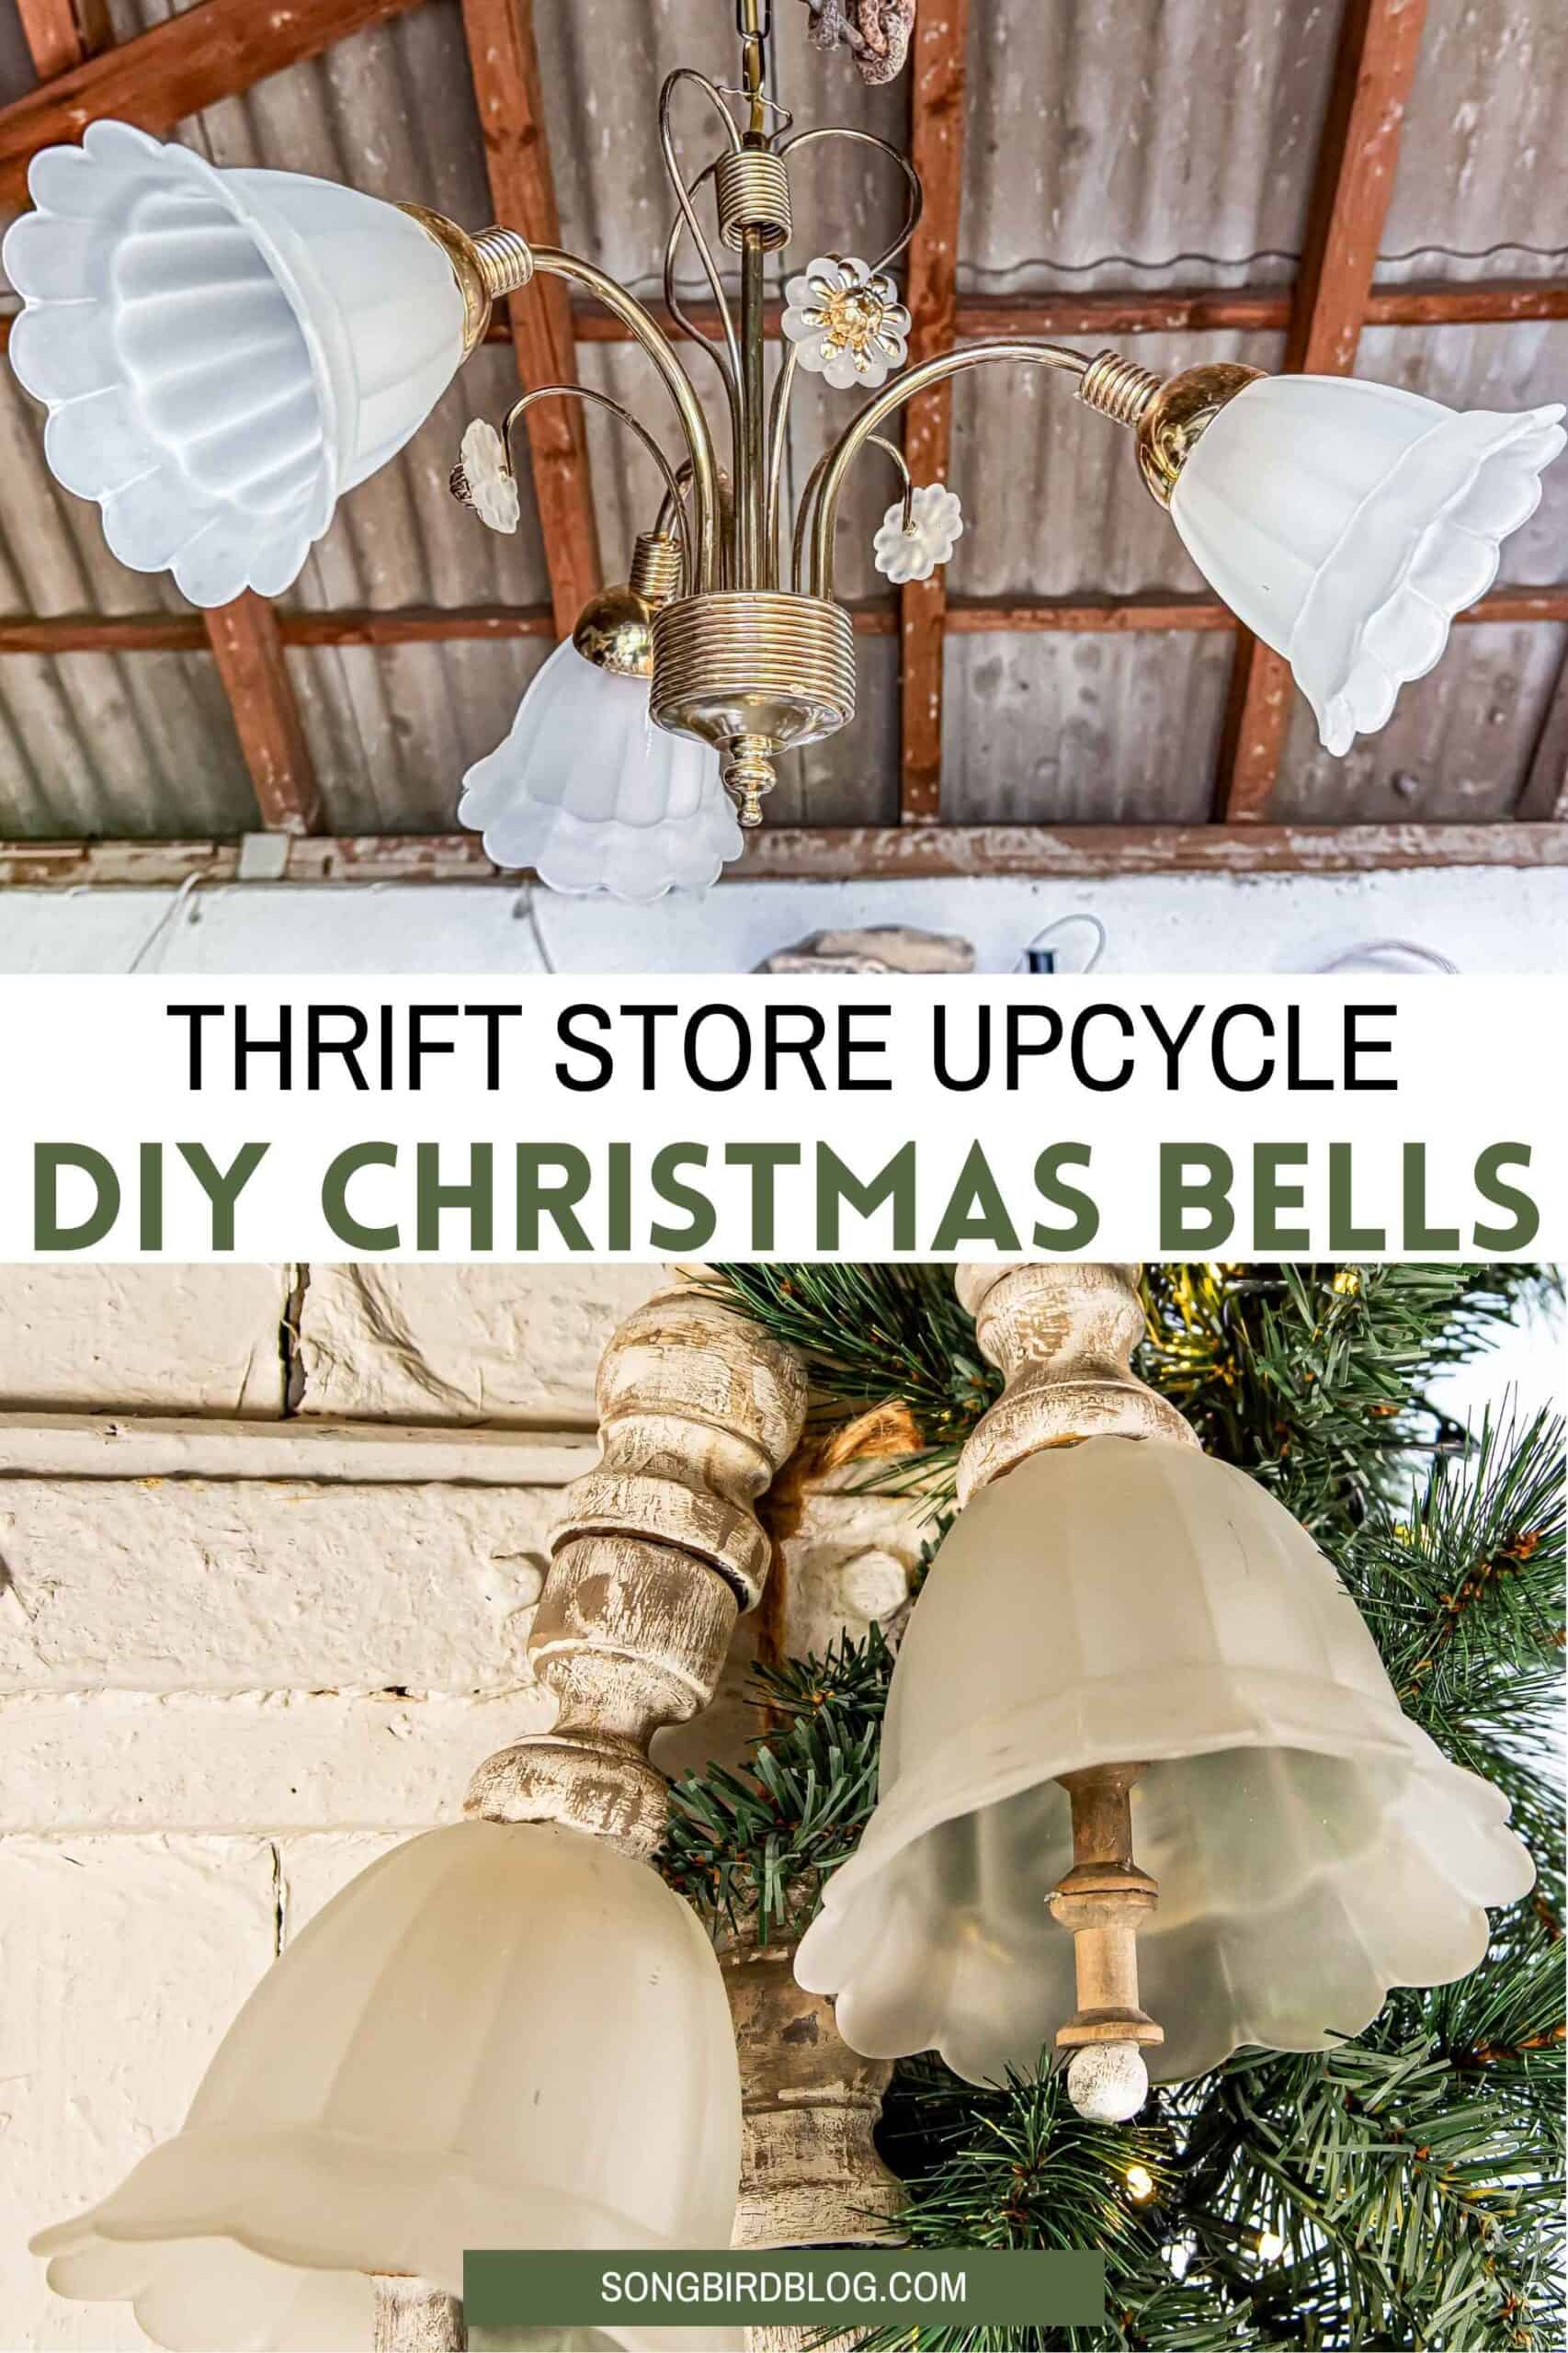
I guess that is why this rather ghastly, cheap looking brass chandelier caught me eye.
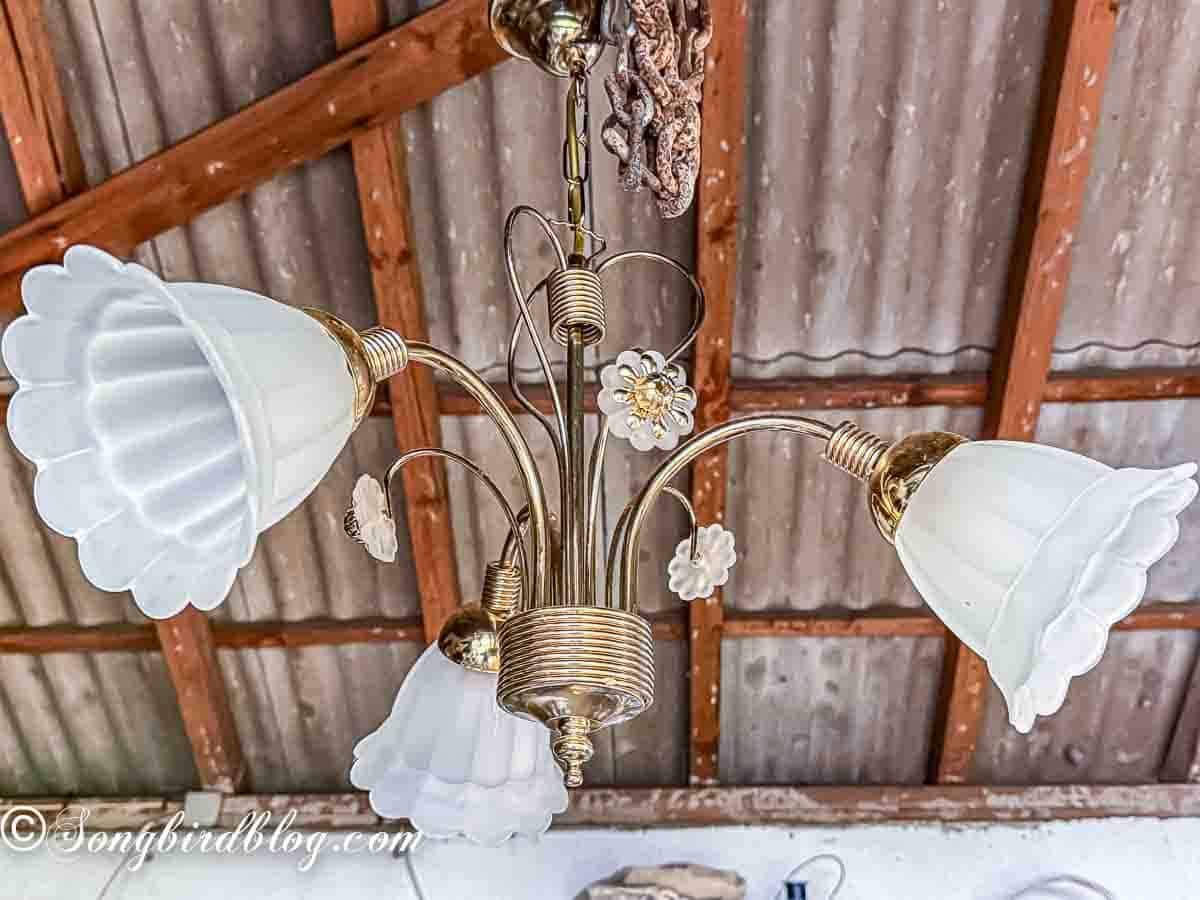
It definitely wasn’t because of its too shiny gold finish, or those flying glass and gold flowers it featured.
No, this chandelier had Christmas bells potential, and as luck would have it, I could take it home for a few bucks.
So a plan started to form…
Today, I’m going to show you how to make beautiful DIY Christmas bells from the glass shades of a tacky chandelier in just seven steps. It turned out to be an easy and fun Christmas craft that I know I will enjoy for many Christmases to come.
Speaking of thrift store projects. Today’s DIY Christmas bells craft is my entry for the monthly Wednesday Thrift Store Decor Tour. It is that time of the month again where a group of talented ladies who are the queen bees of upcycling and thrift store makeovers, have a little online crafting get-together where they share their latest makeover projects. You can find all their amazing thrift store projects for this month at the bottom of this post.
Materials You Need for Making DIY Christmas Bells From Chandelier Glass shades
Once you have found a lamp with glass shades that remind you of Christmas bells you have the most important piece of the puzzle secured already.
But you’ll need materials to form a handle for the bells and to make a clapper. You can used all kinds of things for this. Let me show you how I did it, and what I used to give you some inspiration for what to look for.
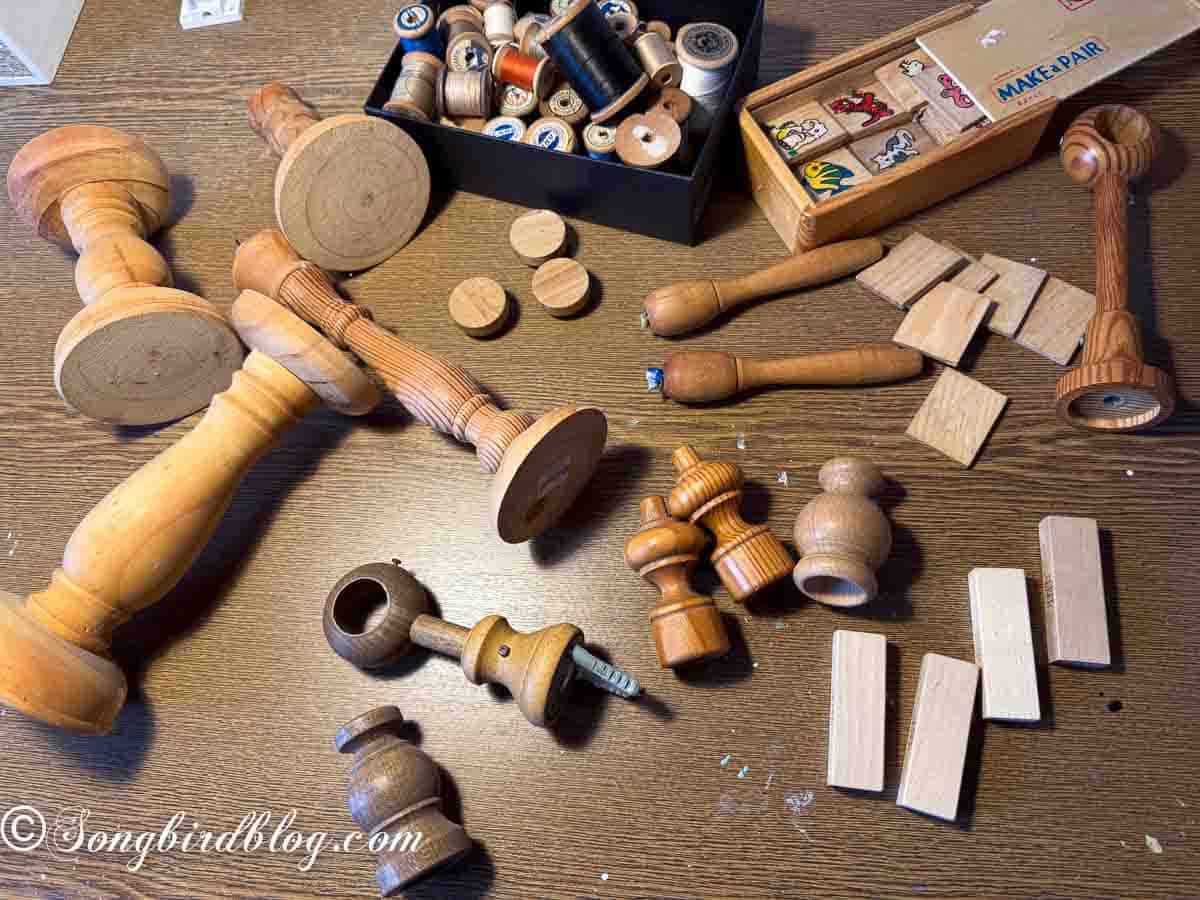
I started with a good rummage through my craft room, garage and garden shed. I had an eye out for anything wood that could be (part of) a Christmas bell handle. I gathered:
- wooden lampsticks I was willing to part with
- a box of wooden sewing thread spools
- wooden game blocks from a children’s puzzle and a jenga game
- my box of curtain pole finials and end caps (remember those from my DIY candle holder project?)
- an assortment of wooden pieces and wood slices
- two handles of a skipping rope (I had high hopes for these)
I also got a few basic craft and shop tools ready because I probably would need them:
- my hot glue gun with sticks
- a table band saw (a hand saw would work too)
- a small hand drill
- some leftover paints and small paint brushes
- rustic jute twine
And then I was ready to start playing.
How to Make Vintage Christmas Bells From Lamp Shades in Seven Steps
1. Step one: free your lamp shades from the chandelier
This step is quite self-explanatory: you have to get the glass lamp shades off the chandelier. In my case it simply meant unscrewing the inner ring that was holding them in place.
This might also be the best time to give your shades a wash if they have been hanging in a thrift store long.
2. Step two: Start playing with your options to create handles for your Christmas bells
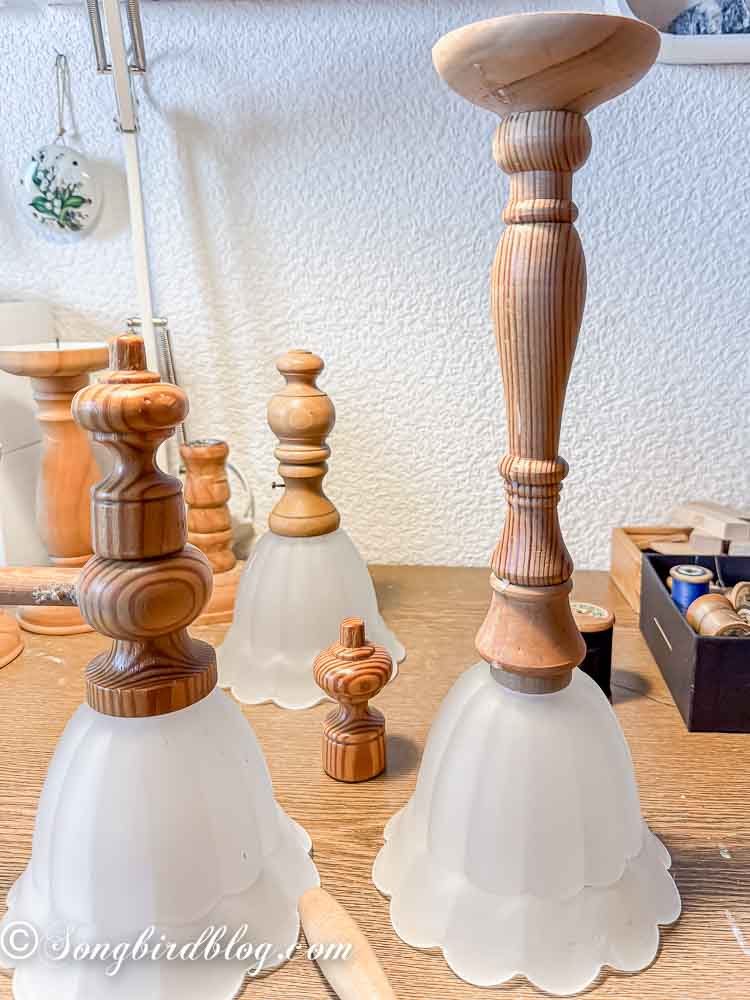
This puzzle part was fun, but it also took the longest. I tried out all kind of combinations to see what would work together to form the handles for my Christmas bells.
Since I had three shades I needed three handles and I kinda wanted them to look the same, or at least very similar.
I stacked and unstacked, tried to visualize the outcome and rearranged some more until I finally settled on a configuration I liked.
3. Step three: Prepare your wood pieces for assembly
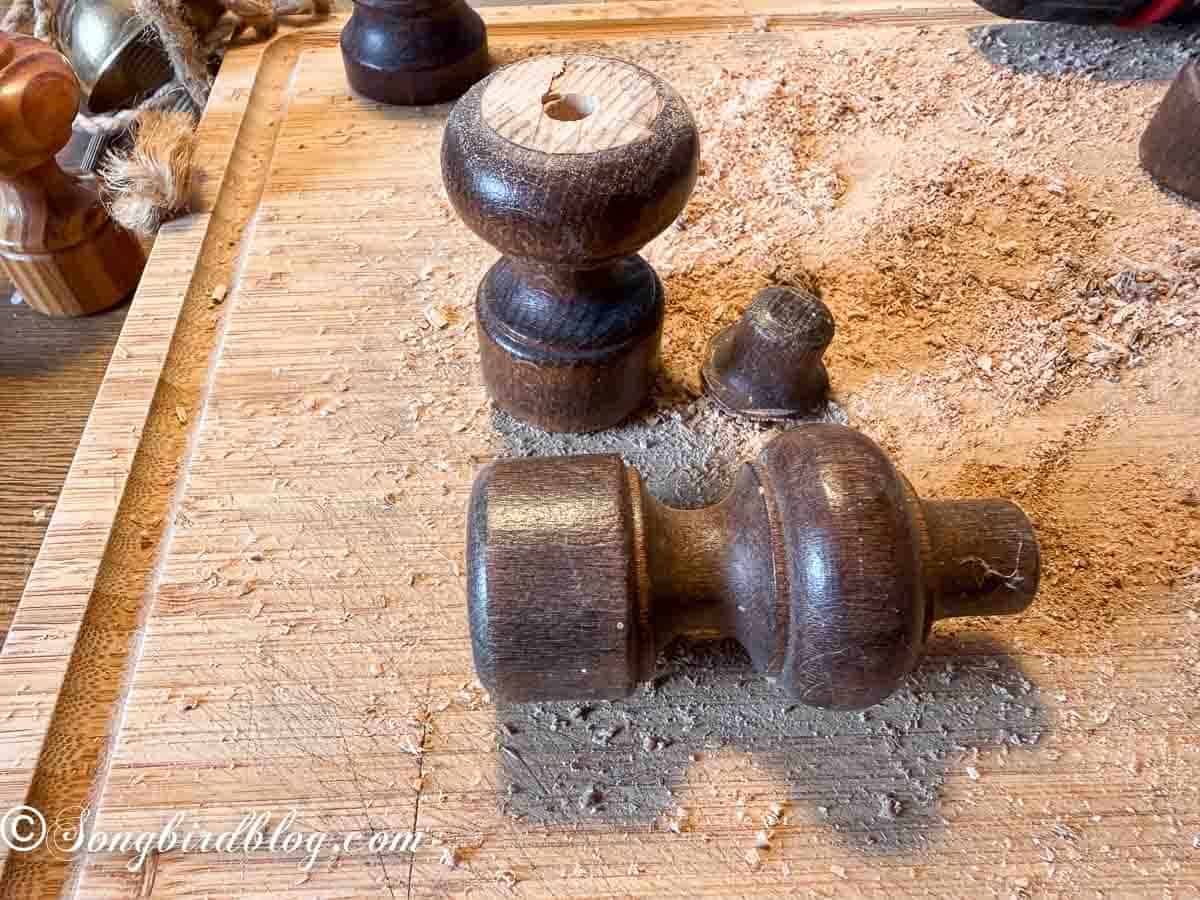
I settled on using different parts of the curtain pole finials that I saved from the house. But I needed to saw a piece of first. In the image above you see one still complete curtain pole endcap and one with its top sawed off. I kept that top, because I had a feeling it might come in usefull.
4. Step four: Drill a hole in the center of all your handle pieces
This is a straightforward step. You have to drill through the center of each piece.
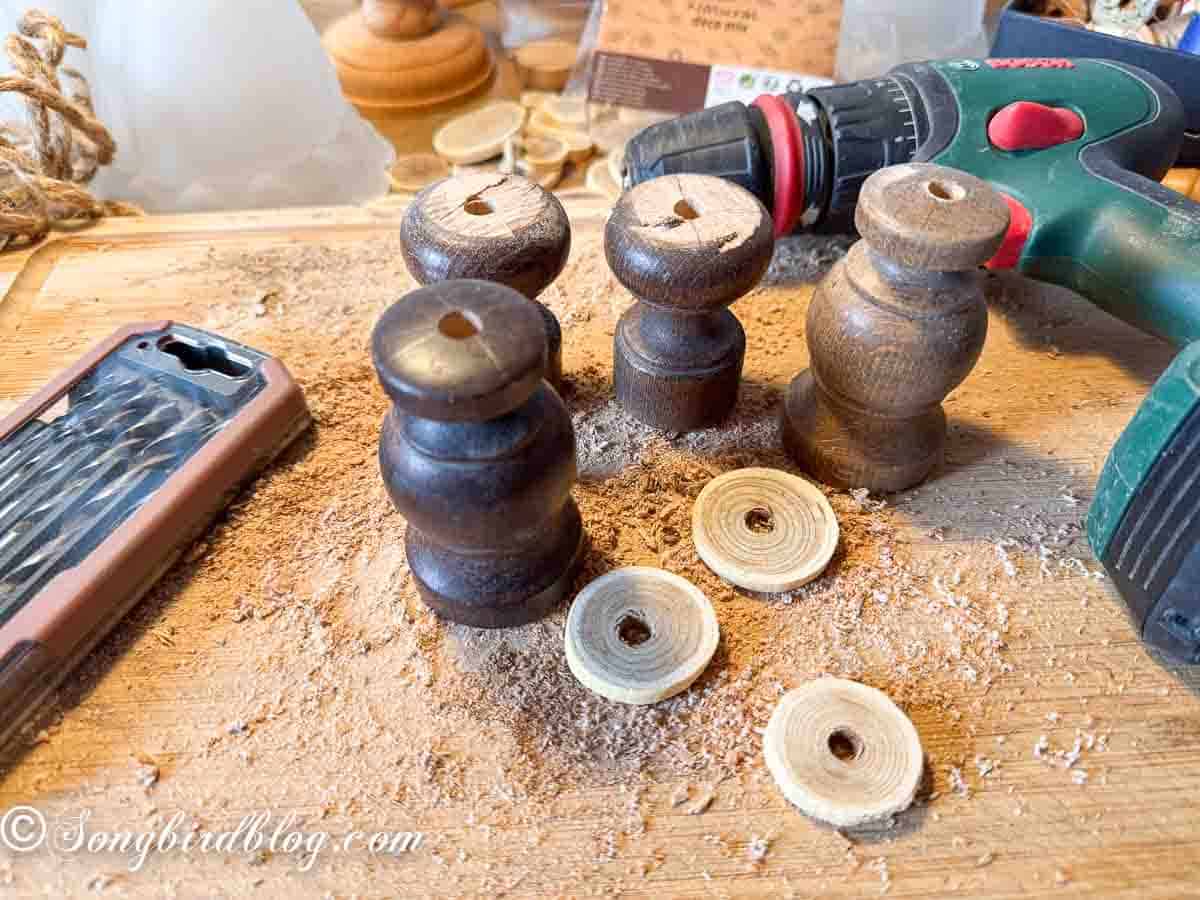
Turns out my finials were real oak, so my drill struggled a bit, but I did it in two steps, first with a smallish drill bit and then with a larger one.
Make a hole that is big enough that you can thread thick jute twine through it.
Looking for More Easy Holiday Projects?


5. Step five: Paint your handle pieces
To give all my different finial pieces a uniform look I painted them. First with a bit of white chalk paint, then with a glaze of light brown fusion paint. Any leftover white and brown will do.
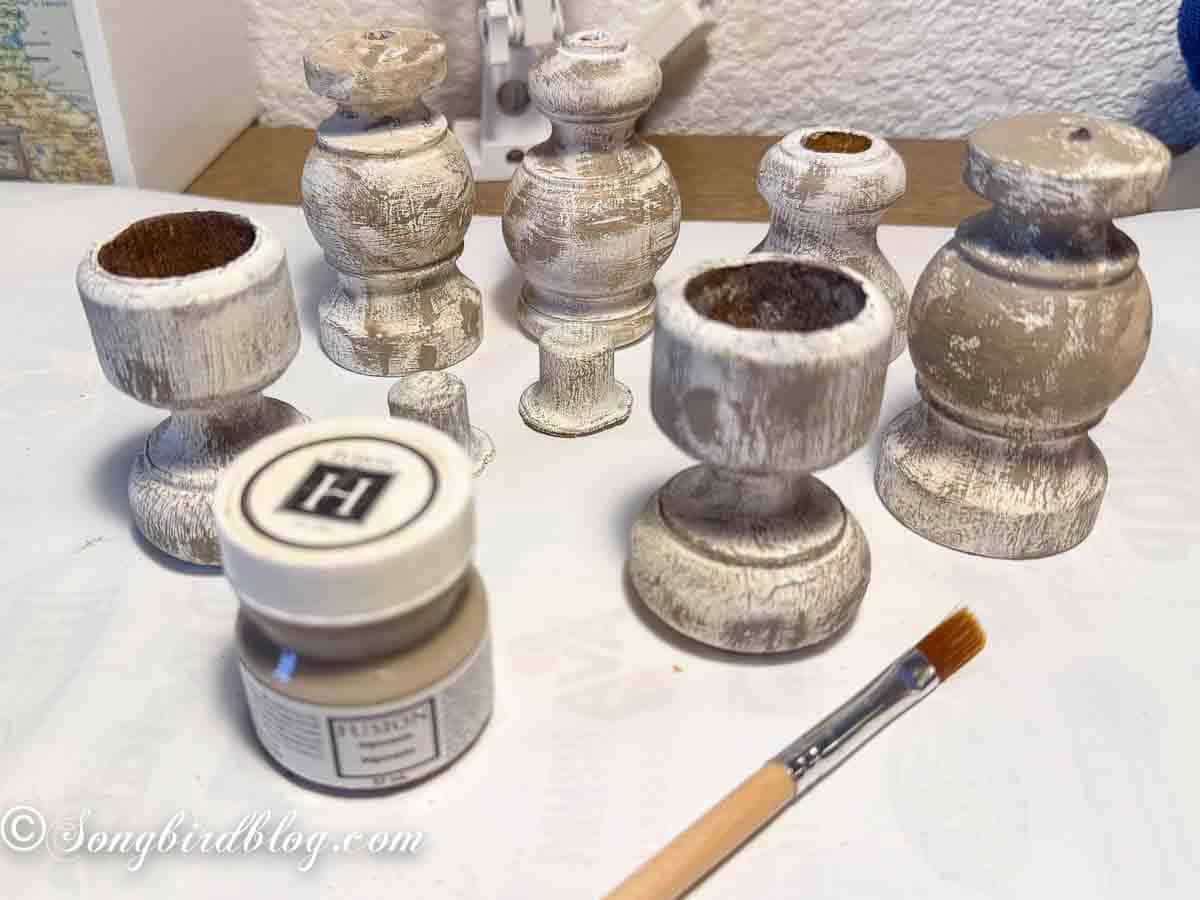
Make sure you do not paint perfectly, evenly or smoothly. Yes you read that right. Paint as sloppy as you can and with a thin layer. We are going for the antique Christmas bells look here. As if those handles have had years of being used and held and thrown around.
Use an almost dry brush and dap off any excess paint. Let your wood pieces dry.
New Here?
Hi, I’m Marianne (aka Songbird)
If you are new here, let me give you some information about our current living situation. We recently bought a 230-year-old farmhouse in Germany and are working on a complete and utter renovation of the house, the barns, and the land.
While working on the renovation, we live in a temporary apartment that we created on the house’s first floor. The apartment is cozy and comfortable but still has a lot of unfinished touches. That’s OK. It will get its final makeover one day. If you’d like to follow our renovating adventures, watch them on our Youtube Channel: Lex and Marianne.

6. Step six: Assemble your Christmas bells
Cut generous pieces of jute twine to form the handles of the Christmas bells.To thread the lose jute twine to the (rough) wooden pieces it helps a lot if you secure and stiffen the end with a piece of metal wire.
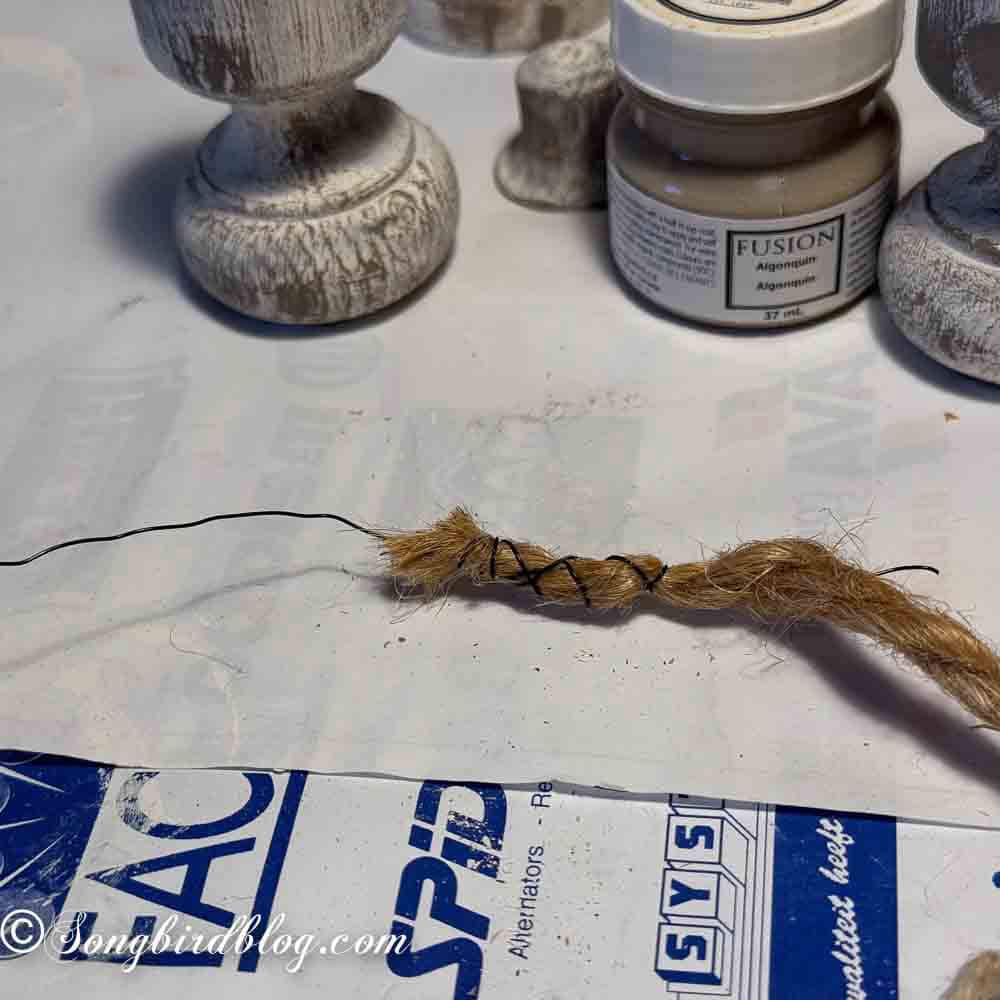
I can’t state enough how much this little step reduces the frustration level of trying to thread rustic jute twine. Don’t forget it!
Then measure how long the twine should hang inside the shade to form the clapper, tie a large knot in the twine and thread it through a wood slice and then through the shade.
This knot forms the bottom tension and helps to keep all the handle pieces in line.
Keep threading all your handle pieces, pull it all very tight and make a knot at the top of the handle. This should be enough to hold it all in place. But to be on the safe side I added some hot glue in between all the pieces too.
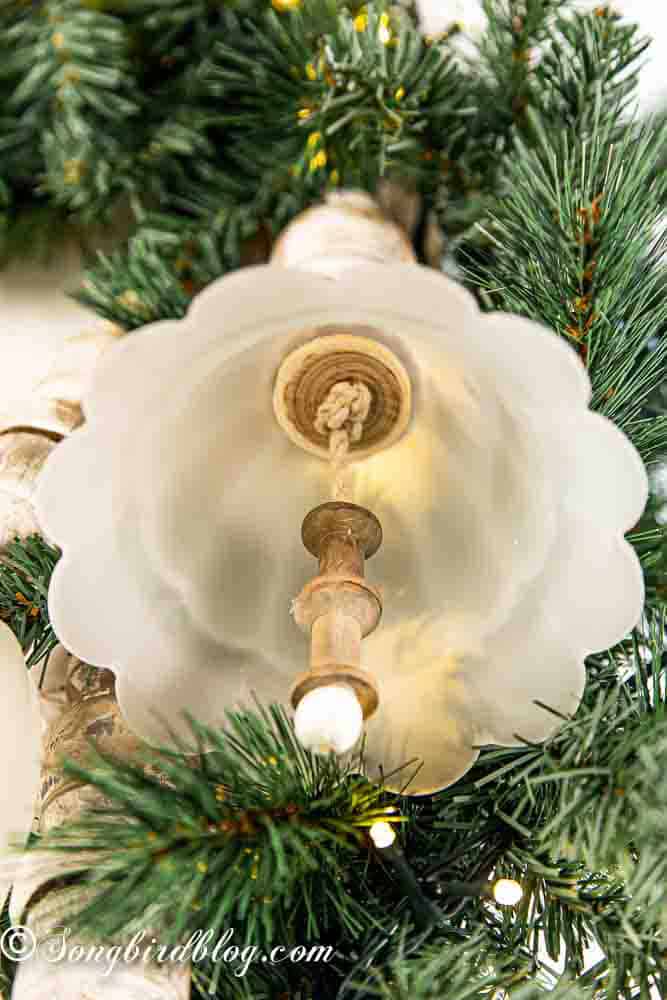
7. Step seven: Finish the clapper
Now all you have to do is fix a clapper for your bells. For two bells I glued that little end cap I sawed of in step 3 to a tiny sewing thread spool and then to the dangling bit of twine. For the third bell, I stacked two of the spools and finished it with a wooden bead.
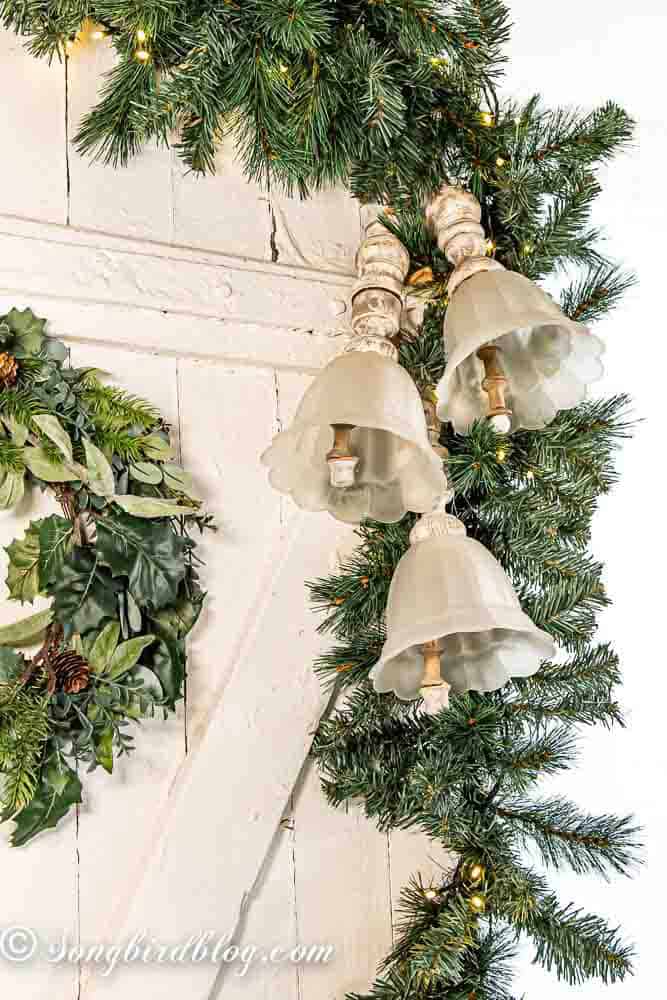
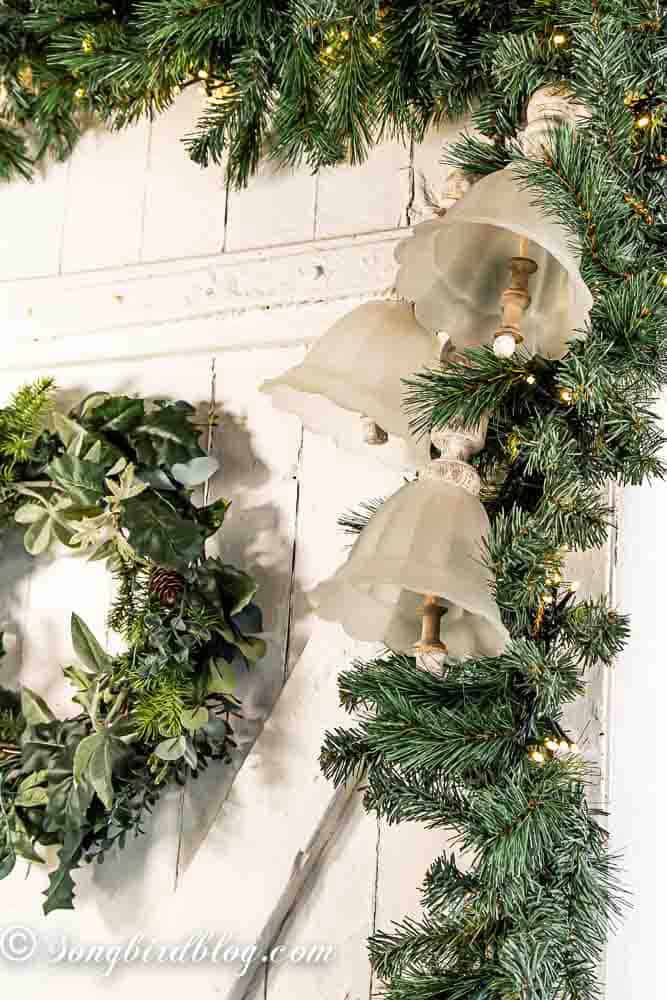
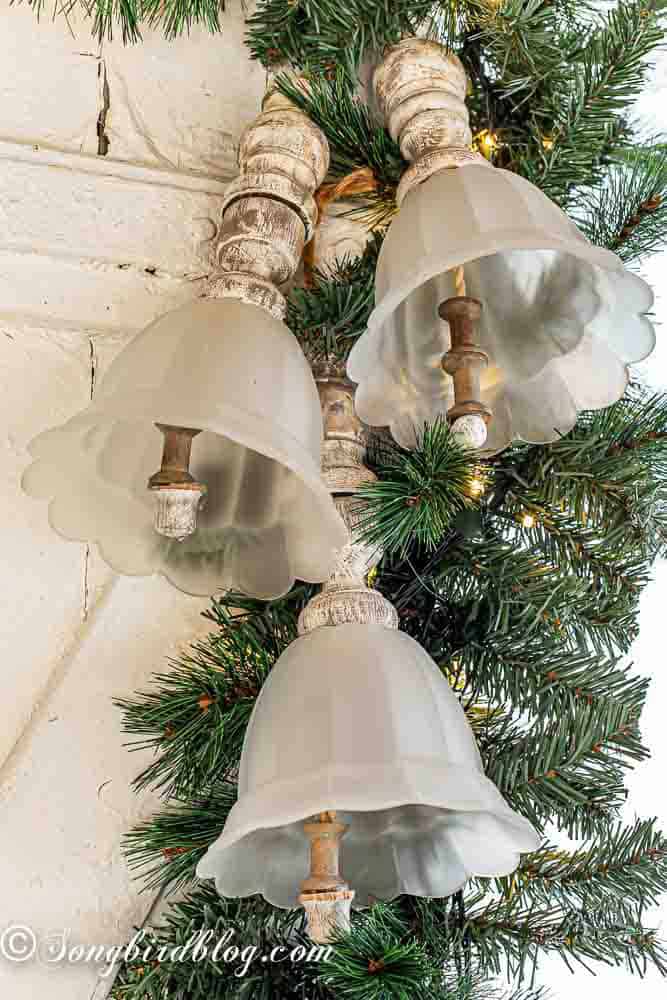
And that is it. Your vintage-inspired Christmas bells are ready and the Christmas decorating can begin.
I am totally in love with how this project turned out. The Christmas bells are all that I hoped for and more.
They do have a bit of weight to them, due to the glass chandelier shade, so they need a proper hook to hang on. But they feel really sturdy and save. I think they are going to last me a long time, for many Christmas decorating sprees to come.
Ah! My quest for Christmas bells has found a conclusion!
Or has it?…
There are quite a few pieces of that chandelier left. I
guess, for nowI’ll say:
To be continued…
So, what do you think of my little vintage style Christmas bells ? Let me know in the comments. I love to hear from you.
And then go and check out the amazing creativity of the other Thrift Store Decor Projects on this tour.
Thrift Store Decor Tour….
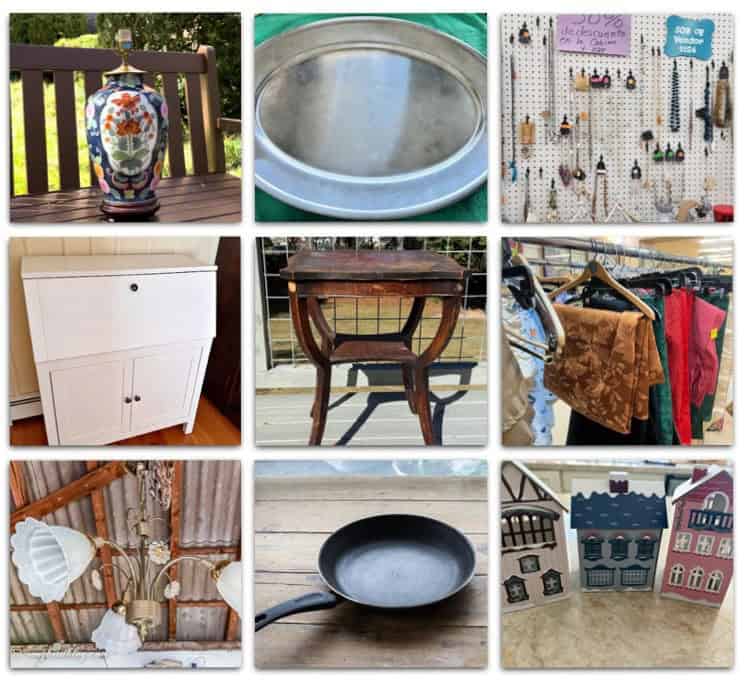
Revamp a Lamp
Our Southern Home
IKEA Secretary Desk Makeover
Exquisitely Unremarkable
DIY Christmas Bells
Songbird – YOU ARE HERE
Old World Santa Christmas Tray
Our Crafty Mom
Mahogany Side Table Upcycle
Shop At Blu
Fry Pan, Tiered Tray, and Decorative Bowls
Funky Junk Interiors
Salvaged Jewelry Suncatchers
My Repurposed Life
Beautiful Thrifted Thanksgiving Tablescape
Redhead Can Decorate
Gingerbread Village from Christmas Houses
My Uncommon Slice of Suburbia

If you liked this Christmas Bells DIY project, don’t forget to pin it to your favorite craft or Christmas board on Pinterest.
Oh I love these. I’ve had all the supplies to make them for a while, but needed a push to sit down and do it. Thanks for the DIY…and the motivation!
Have fun making these. I loved the whole process.
I love those and haven’t seen anything like it. Thanks for sharing the end product and also the steps in the process.
You are welcome, I am glad you liked them.
Marianne
I love your DIY Christmas Bells made from junky finds! Brilliant idea to add the metal wire for threading the jute. I’ll have to file that one away.
I like the bead and the spools on the one clapper. I think it’s a great fit. Beautiful job, very creative use of junk.
pinned!
gail
Thank you Gail. I am happy you liked them.
Those Christmas Bells are so cool. What a great way to use the light covers. Thanks for sharing.
You are welcome, glad you liked them.
Very clever…but don’t throw away those glass and metal flowers from the chandelier! I’m sure there is a use for those!
I haven’t thrown anything away, I intend to use most if not all of it.
Oh my gosh…. from flying flowers (LOL) to pure fabulous! Your bells turned out AMAZING and are the perfectly unique shape for this. I have a neighbour giving away a chandy so maybe I should take it off her hands after all… cuz it’s all about those shades! Fab upcycle, Marianne! And of course you styled it to perfection.
Thank you, Donna. Appreciate it.
These are absolutely amazing! I am not very crafty, but I have friends who are. Maybe they will make some for me.
I really think you could do this yourself, it is not a hard craft to do. But if not, I hope your friends will make you some.
Your bells are stunning —perfect Christmas crafts! What a find on the chandelier. I had seen this done with smaller gardening pots, but now I’ll be on the hunt for the perfect light fixture. Love this makeover!
xo
Kristin
Marianne, these are darling! What a unique little project. Christmas bells are just fun. Pinned!
Now I want bells!!! These look like they came from a high end Christmas store! It’s so nice to see you again, Marianne! You did a beautiful job on these bells!! 🔔
Beautifully done – I do believe I’ve found a new antiquated Christmas project. Thanks for sharing with such detail.